
the c and a minor chords
Alright, time for some basic theory. We're going to look at the nuts and bolts of what a chord actually is. First thing we need to look at is our C Major Scale from back in Lesson Four. It is spelled like this:
C-D-E-F-G-A-B-C
We start with this. As I repeat like a theme many times on this site, scales are the basis for all that we know as music. Chords are a prime example. From the C Major Scale, take the 1st, 3rd and 5th notes and isolate them. This is called a “triad”, and triads form the basis for chords. If you look above you will see that that gives you C, E, and G, represented in blue. These are the three notes that make up a C Chord. You may be confused if you look at the C Chord diagram below and see that there are a total of five strings being played, but even though there are five strings used there are only three different notes being played. It works like this: On the fifth string you're playing a C. On the fourth an E, and on the third a G. You could only play those three strings and you've got a nice-sounding C Chord, but if you look at the notes on the second and first strings you'll see that they are another C and E respectively. So when you strum your C Chord you're playing two C's, two E's and a G. Five strings, three notes.
Go ahead and put these together. Simply follow the same logic we used to play G and D in Lesson Three. Place your fingers where the dots are in the diagram below, paying close attention to the numbers above the diagram, as they tell you which finger belongs to which dot. Remember that O mean to play the string open and X means don't play the string at all!

Start with the C chord. Place your fingers on it and check to see that everything looks correct. Then starting from the fifth string pick one string at a time and make sure everything is coming through loud and clear. Sometimes your fretting hand fingers will touch up against strings that they shouldn't. Prevent this from happening by staying on your fingertips, with your top knuckle bent away from the fingerboard. Sometimes it may not seem like it, but there is always a position you can get your hand in that will make the chord work. I’ve had students who were big guys whose pinkies were bigger around than my thumb. They didn't think they would be able to do this in a million years, but now they can. They just had to dial in the right combination. Sometimes you need to move your thumb around. You'll get it! If you've already gotten G and D down, these will be easier. If you don't, you shouldn't be here yet.
The A Minor is constructed from the same scale, but beginning from A, giving you the following:
C-D-E-F-G-A-B-C-D-E
This time I spelled out the notes of the chord in red, since the result is a minor chord. Minor is an extremely important musical term that we'll discuss in much greater detail later on, but for now just think Major - Bright, and Minor - Dark. Any chord that doesn't have an abbreviation after it is Major. That includes the G, D, and C chords that we've already worked on. A minor chord could be written with the abbreviation "mi", "min", or simply "m". We'll be using the "m". Also you’ll notice that I had to extend the scale by a couple of notes in order to get to the 5th of the A triad, which is E. Remember that scales continue on forever, not just for one octave! The fingering for this chord consists of two A’s, two E’s and one C, and is very easy to get to from the C chord. Simply move your third finger to the second fret of the third string. Everything else stays in place! Here at the ‘Buzz we love simplicity, and look for it whenever we can.
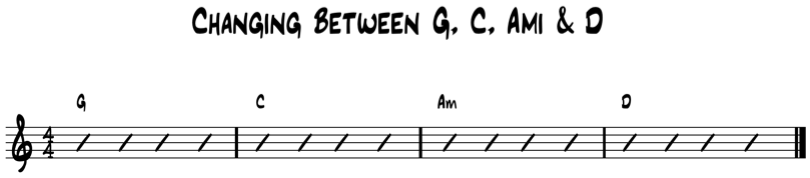
Once you've got these two down, apply what you learned from Lesson Six. Practice strumming the C four times and changing to the Am without slowing down. Try practicing at 60 bpm on your metronome. Don't have a metronome? Here's a metronome. No excuses, ever. Once you are comfortable with that, practice going from G to C to Am to D, strumming each one four times. G to C will probably pose the most difficulty, so I recommend spending some extra time working on that transition. Always isolate the hard parts! Have fun and good luck.
Here’s a video. Notice that when changing from C to Am I only move my third finger!